Base Users Guide: 
| ||
|---|---|---|
| Prev | Chapter 3. Installing a Rocks Cluster | Next |
This section describes how to install your Rocks cluster frontend for Rocks Version 7. It is significantly different than Rocks Version 6.
 | The minimum requirement to bring up a frontend is to have the following rolls:
Rocks 7 has only been tested on CentOS. Other versions, like RedHat at the same version number may also work. |
 | Rocks version 7 supports a network-only installation. All rolls must be located on a roll server on a network that is accessible by your frontend |
Insert the Kernel Roll CD into your frontend machine and reset the frontend machine.
| You may install from a USB stick. Simply copy the kernel iso image to a usb stick using dd. It is compatible with both UEFI and legacy BIOS systems. The standard process of burning a CentOS USB bootable stick from the kernel iso image |
| For the remainder of this section, we'll use the example of installing a fairly complete frontend, with multiple rolls, that is, we'll be using |
After the frontend boots off the CD or bootable usb, you will see:
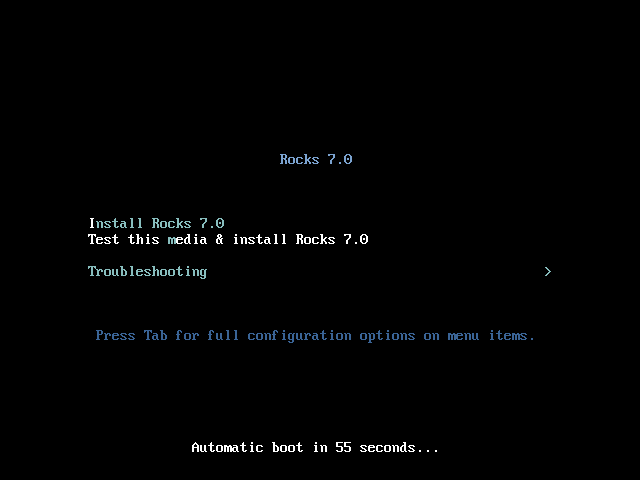
When you see the screen above, you can select "Install Rocks 7.0" or Test this media & install Rocks 7.0". Furthermore, you can add boot options. The Rocks 7.0 installer is built using extensions to anaconda, RedHat/CentOS installer and anaconda boot options are available
| Unlike, Rocks 6, this bootable CD is only used for frontends. Client nodes must install over the network using PXE |
 | All of the anaconda installer terminals are available. In particular, Ctrl-Alt-F2 accesses a shell prompt on your system respectively. |
Select language and configure your public network
| The CentOS installer, does not require a specific order to the screens of information that must be entered. If a certain selection is grayed-out, it indicates that the particular section is not ready to be visited |
| Not all sections are visible you must use the scrollbar to see them all. In particular, it is quite common to forget to properly set the timezone |
Your first see, the language screen. Rocks 7.0 has only been tested with English/US. Other language selections may cause issues

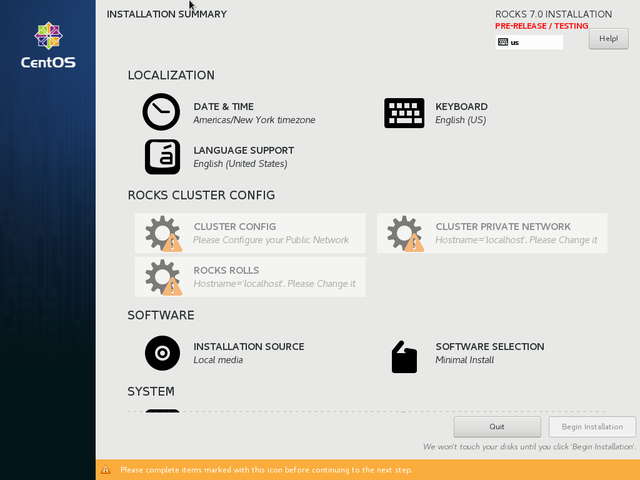
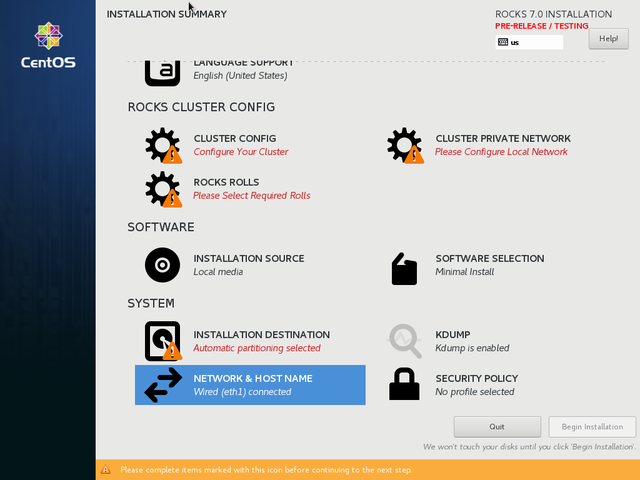
If your local network does not automatically supply you with a network configuration, you will see a screen that looks like the following. The grayed selections indicate that something else must be done. In this case, the public network must be configured and the hostname must not be localhost
The network configuration screen is in the "System Area" and you need to scroll using the scrollbar supplied by anaconda. This scrollbar can be "thin" or "difficult to see". The following picture illustrates the scrolled down.
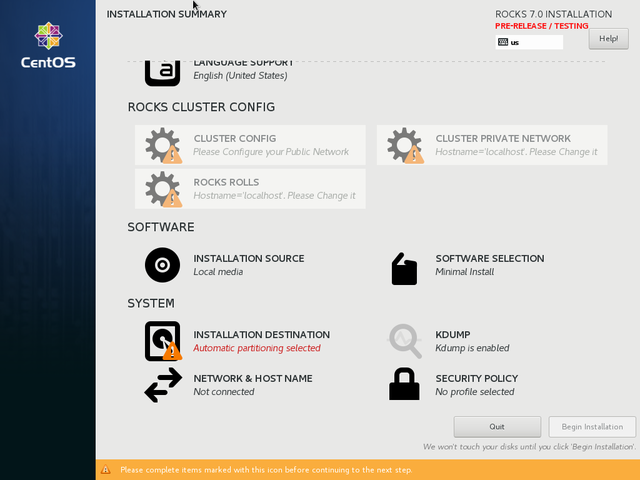
Click on the "NETWORK & HOST NAME" area to configure your public IP and hostname. If you have multiple interfaces, configure only the interface for public access on this screen. It is eth1 in this example.
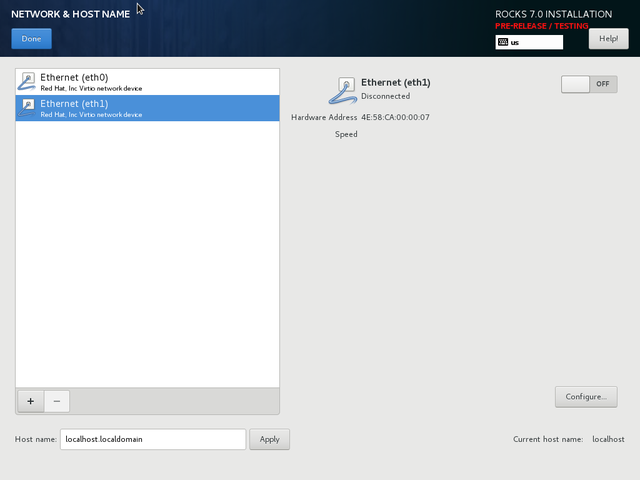
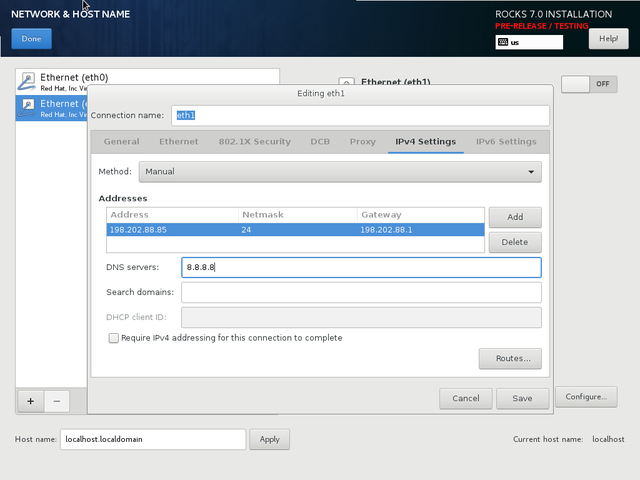
click the "Configure..." button to get to network configuration. In the following screen, configure the IPv4 address. Notice that it is manual configuration.
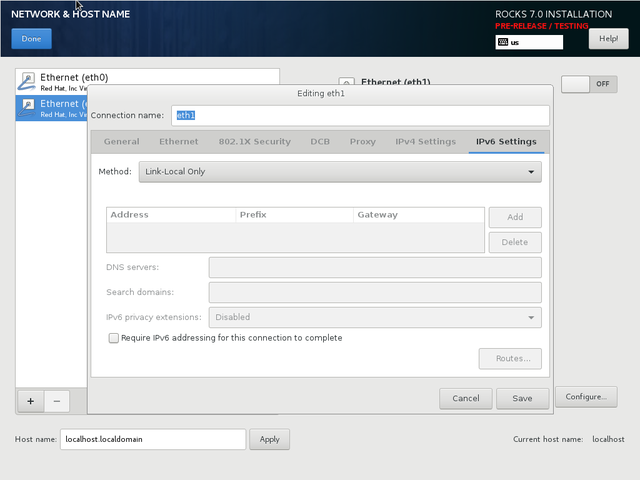
Also configure IPv6 to "link-local only"
After clicking "Save" and "Done" you return to the network screen. At this point, click the on/off slider in the upper right-hand corner the screen to activate your network interface. If all goes well, you should see both your IP address and DNS name. If you desire to change the hostname, edit the Host name box and click "Apply"
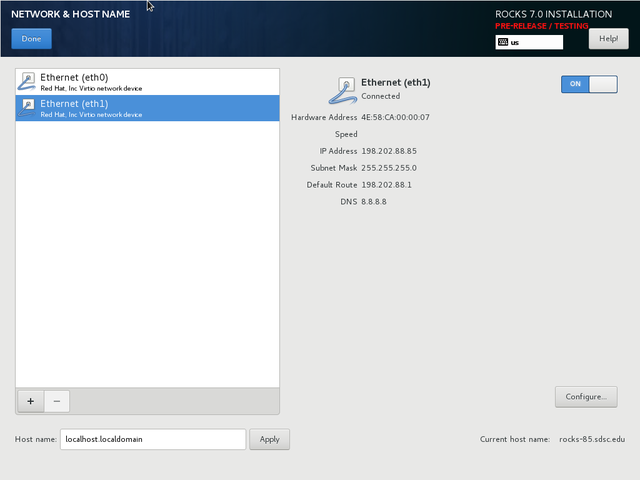
If you are successful, you home screen should now reflect that the network is up and configured.
Configure your local network.
Scroll up to the ROCKS CLUSTER CONFIG area and then click on the CLUSTER PRIVATE NETWORK screen.
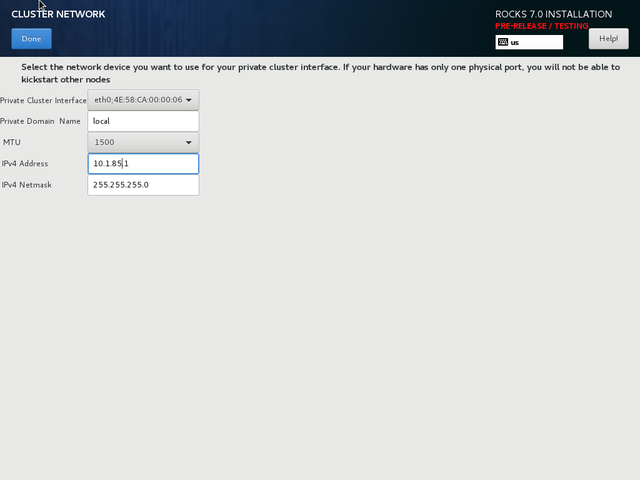
The "private cluster interface" is a drop-down menu selection that allows you to choose any physical interface for the private network. The interface you chose for your public network is not available on this list. If you system has only one physical interface, a virtual interface is constructed for you.
| You may select any IPv4 subnet you choose. However, conflict with the public network is not checked. Your public and private IP subnetworks must not overlap. |
When you click save, the home screen now indicates that this configuration section is complete.
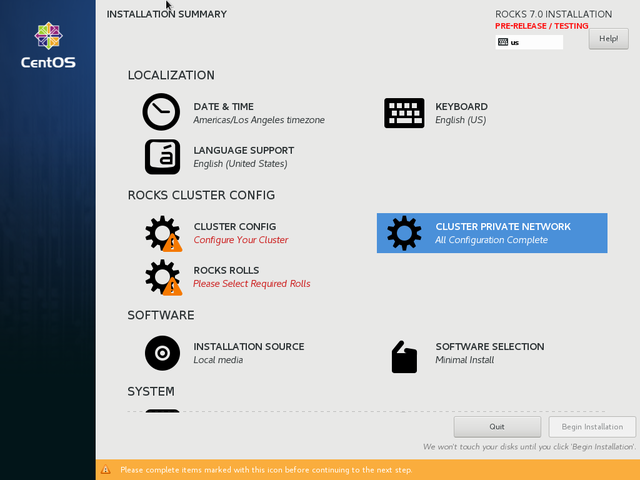
Select your rolls. Click on the ROCKS ROLLS selection
Rolls define your cluster's configuration. The default location for rolls may be suboptimal for your cluster in terms of accessibility or performance. It is possible to mirror the rolls onto any (non-rocks) http (web) server. When you have selected your roll server, click the List Available Rolls button.
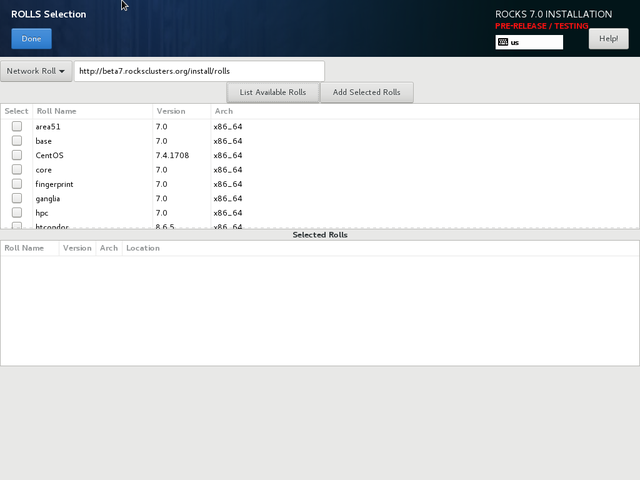
You have several choices in selecting rolls. You may hit the "Select" word at the top of the column of check-boxes. This will select all rolls available at that server. You may select/de-select individual rolls, too.
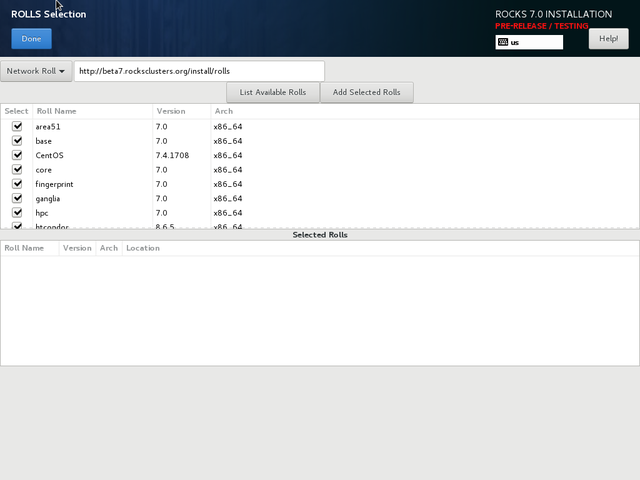
| You must click on "Add Selected Rolls" to actually add these rolls for your frontend |
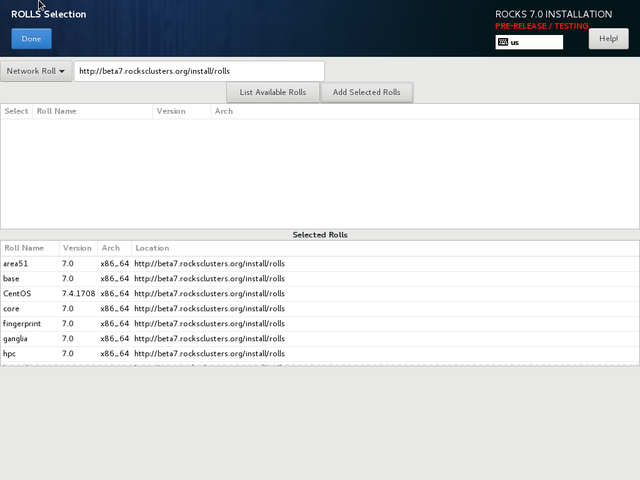
| You can download rolls from multiple roll servers. Simple edit the URL of another roll server and click "List Available Rolls". |
When you hit done and you have selected the required base, core, and kernel rolls, it will take 5-10 seconds for Rocks to build a local database. At this point the screen will look like.
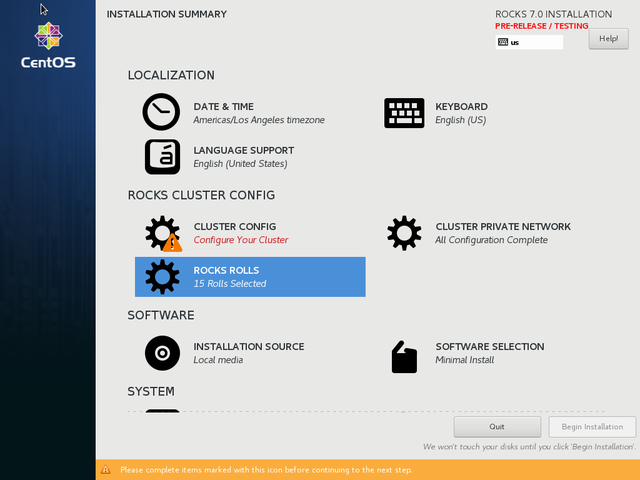
This indicates that 15 different rolls have been selected.
Configure your Cluster
You must enter the CLUSTER CONFIG screen to finish configuration
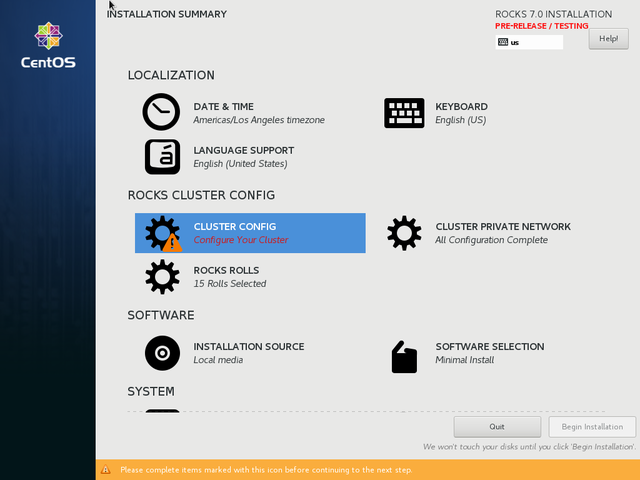
Any items that need to be completed are highlighted in red.
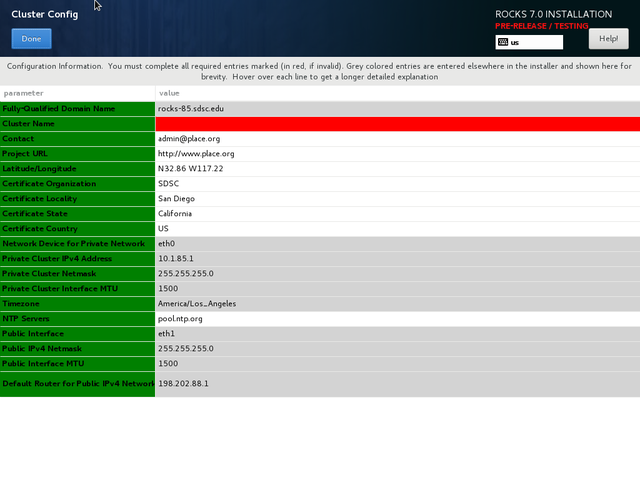
Once a contact has been filled in, the red will disappear. Please also note that grey areas are informational and is data gathered from other parts of the installer.

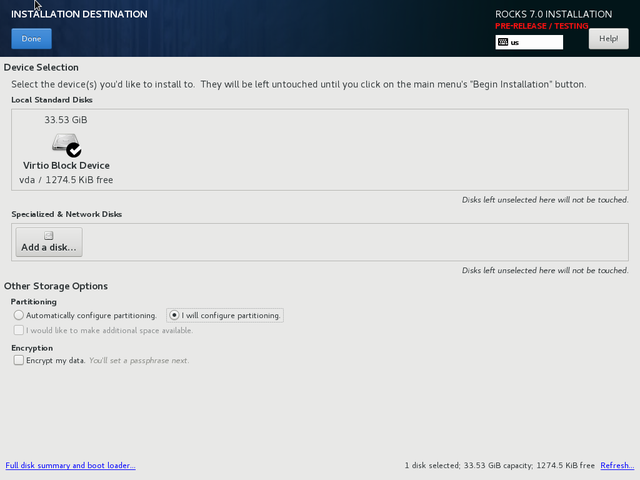
Configure partitioning on your frontend
Rocks 7 only supports manual partitioning on frontends. You will need to scroll down to the INSTALLATION DESTINATION screen. It will default to Automatic partitioning (which uses LVM).
| Rocks has no particular partitioning requirements on frontends, however the partition that holds your /export/rocks directory must be large enough to mirror all of CentOS and rolls (at least 10GB) |
Highlight the "I will configure paritioning" button and then click done.
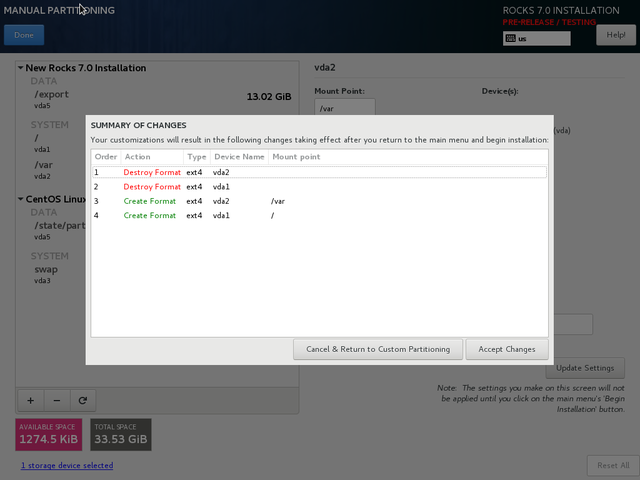
At this point, you are in Anaconda's partitioning system and can follow its usual setup. You can setup raid (recommended), or simply create one large "/" partition (not advised, but supported). It is beyond the scope of this document to highlight all of the possible disk configuration options.
When you click "Done", you should get a confirmation screen. The following is a sample configuration.
Begin Installation
| Once you click "Begin Installation", There is no going back. Up until this point, all changes are held in memory. After this, partitions are formatted |
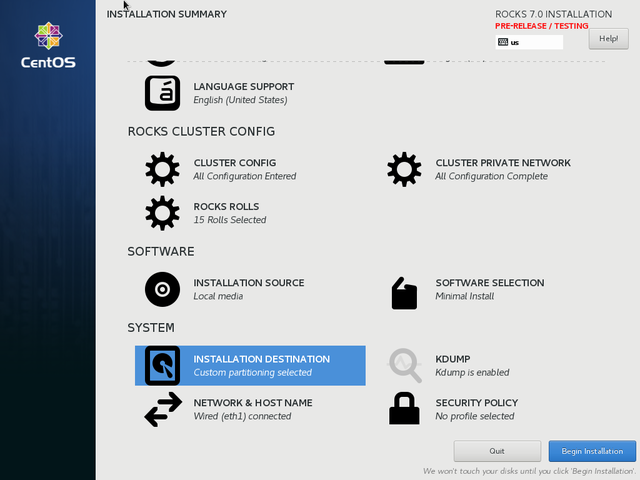
| There is no "confirm" to "Begin Installation" |
Let installation progress. And setup root password
Installation is now automated, but there is a lot of work to do. Partitions must be formatted, rolls must be downloaded, packages are installed and then your system is configured
Click on the SET ROOT PASSWORD item and set your password. Do NOT setup a user at this point
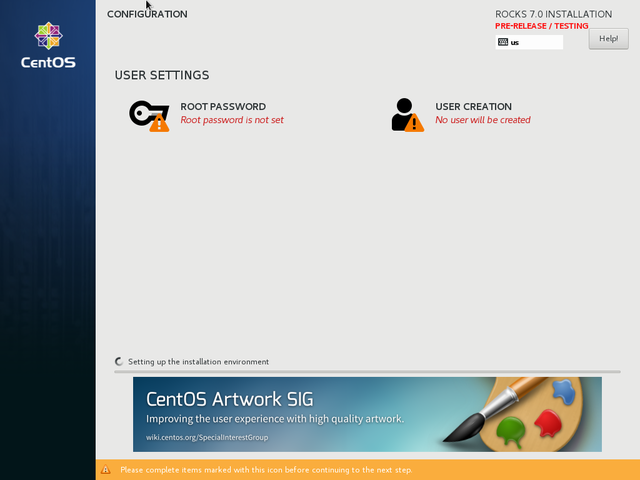
You installation should now look similar to
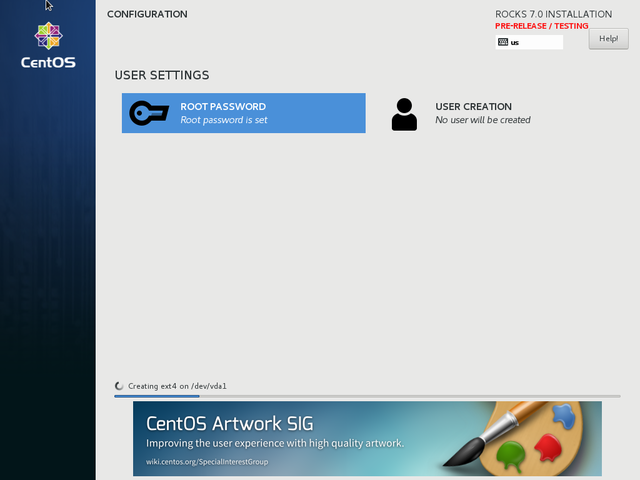
The above shows an ext4 file system being created. After that rolls are downloaded
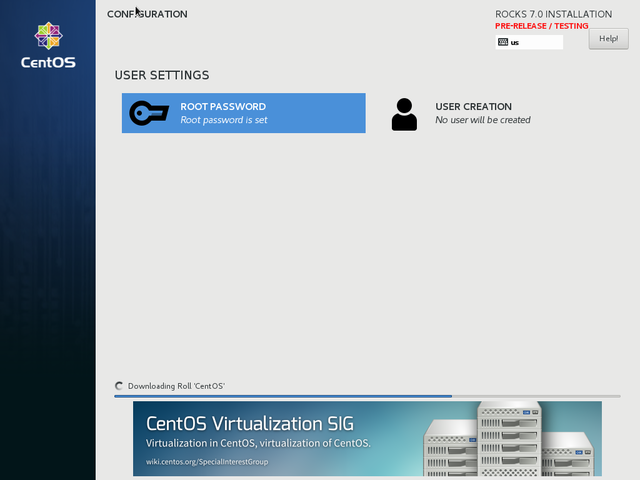
| It will take a while to download all the rolls you selected, depending on your network speed. You must be patient. If you bring up the command console (CTRL-ALT-F2), you can follow the download progress with
|
After a while, all rolls are downloaded, the local distribution is created, and packages are installing

After post-installation is complete, you will see the final screen
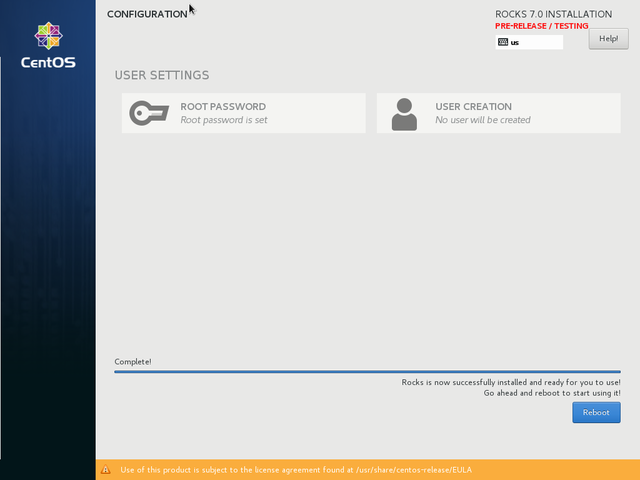
Click reboot, remove your bootable CD or USB stic, and then wait for your system to come up